If you follow this tutorial, you will learn how to connect to the FTP on your Minecraft server using FileZilla. To be able to do this, you need to follow the steps below.
1) Download the FileZilla Client from the following link: click here.
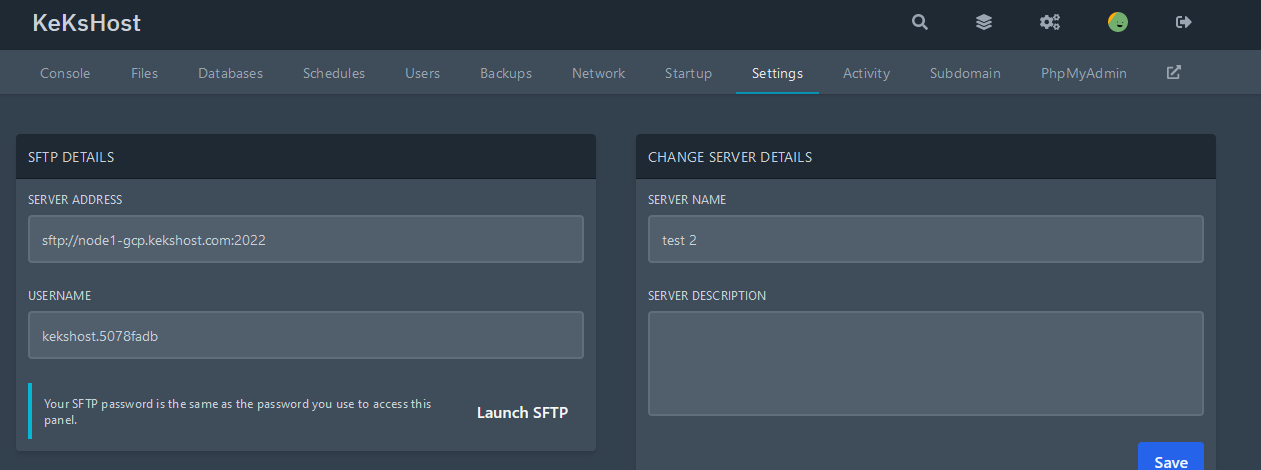
2) Go to the Settings section in the top bar of the Pterodactyl panel:

3) Here, the FTP details will be displayed: SFTP server hostname (SFTP Address) you're connecting to, SFTP port (SFTP Port), and the username. The FTP password is the same as your panel password.
From the example above, you can obtain the following data:
Host: sftp://node1-gcp.kekshost.com (in FileZilla) or node1-gcp.kekshost.com if using WinSCP
Port: 2022
Username: kekshost.5078fadb
Password: same as the panel password
4) Open the FileZilla program by clicking the icon on your Desktop or searching for FileZilla in the Windows start menu.
5) Enter the obtained server data into the top bar of FileZilla, as shown in the example below:

The FTP password is the same as the panel multicraft password (as mentioned above).
6) Click "Quickconnect" and then click "OK" for any warnings that appear.
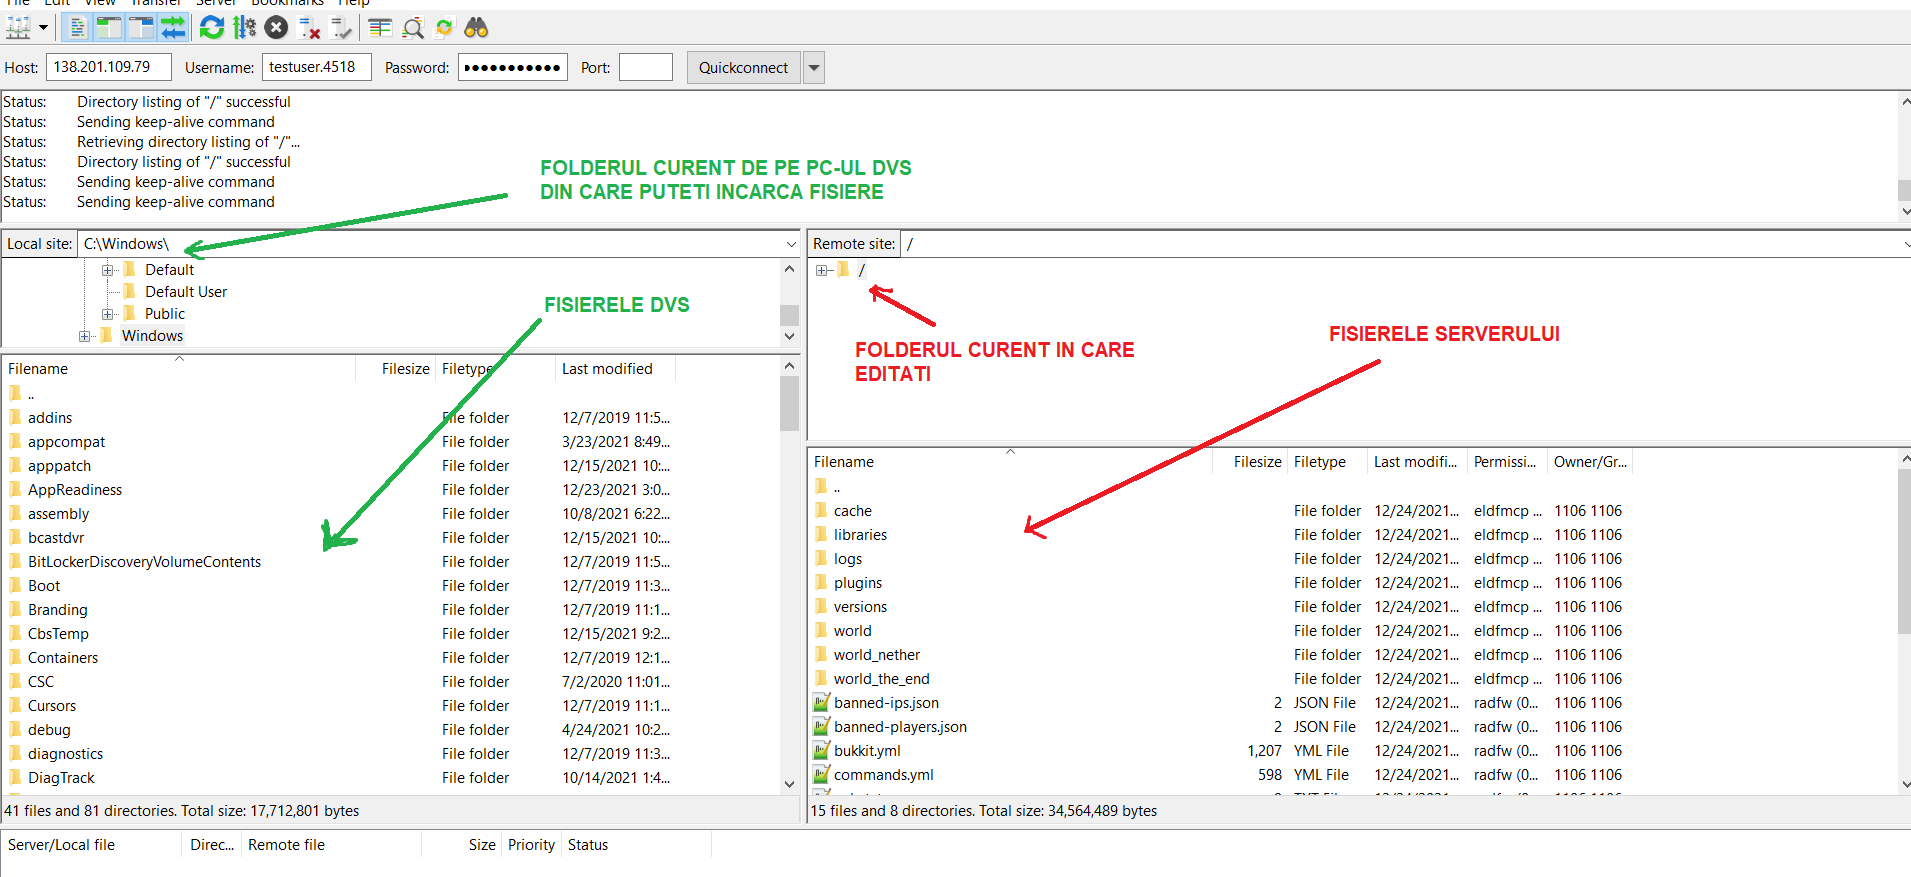
7) Congratulations! If no errors have appeared, you've successfully connected to your server. For a server that has already been started from the panel, files will appear.
In FileZilla, you should see something similar to the image below:

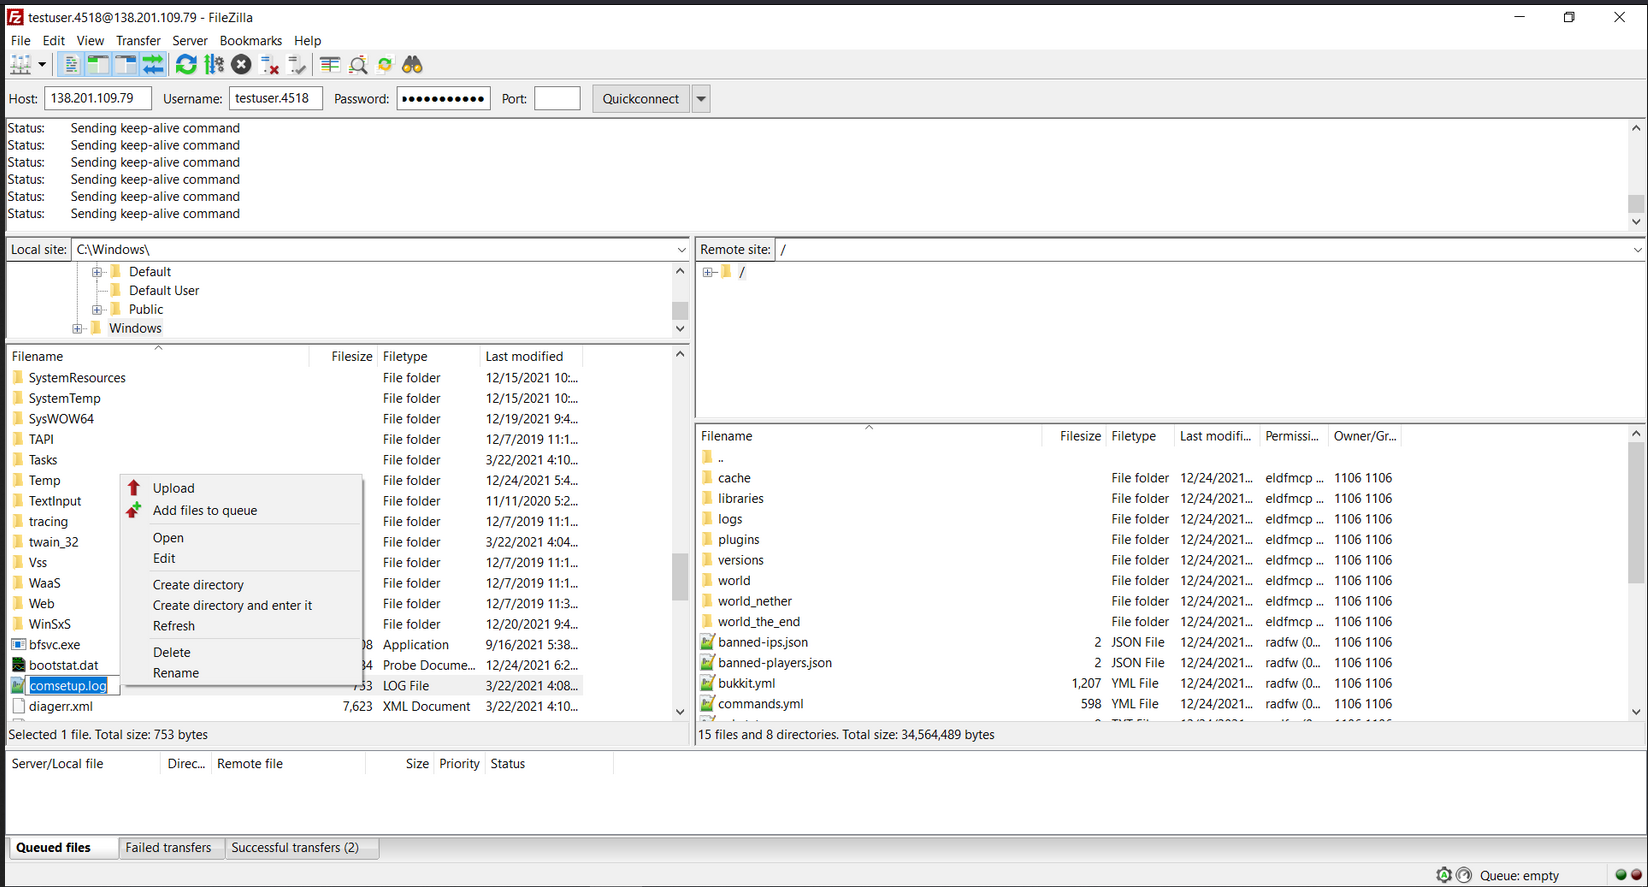
Now you can upload files from your PC to the server by right-clicking the file you want to upload and selecting "Upload," as shown in the image below:

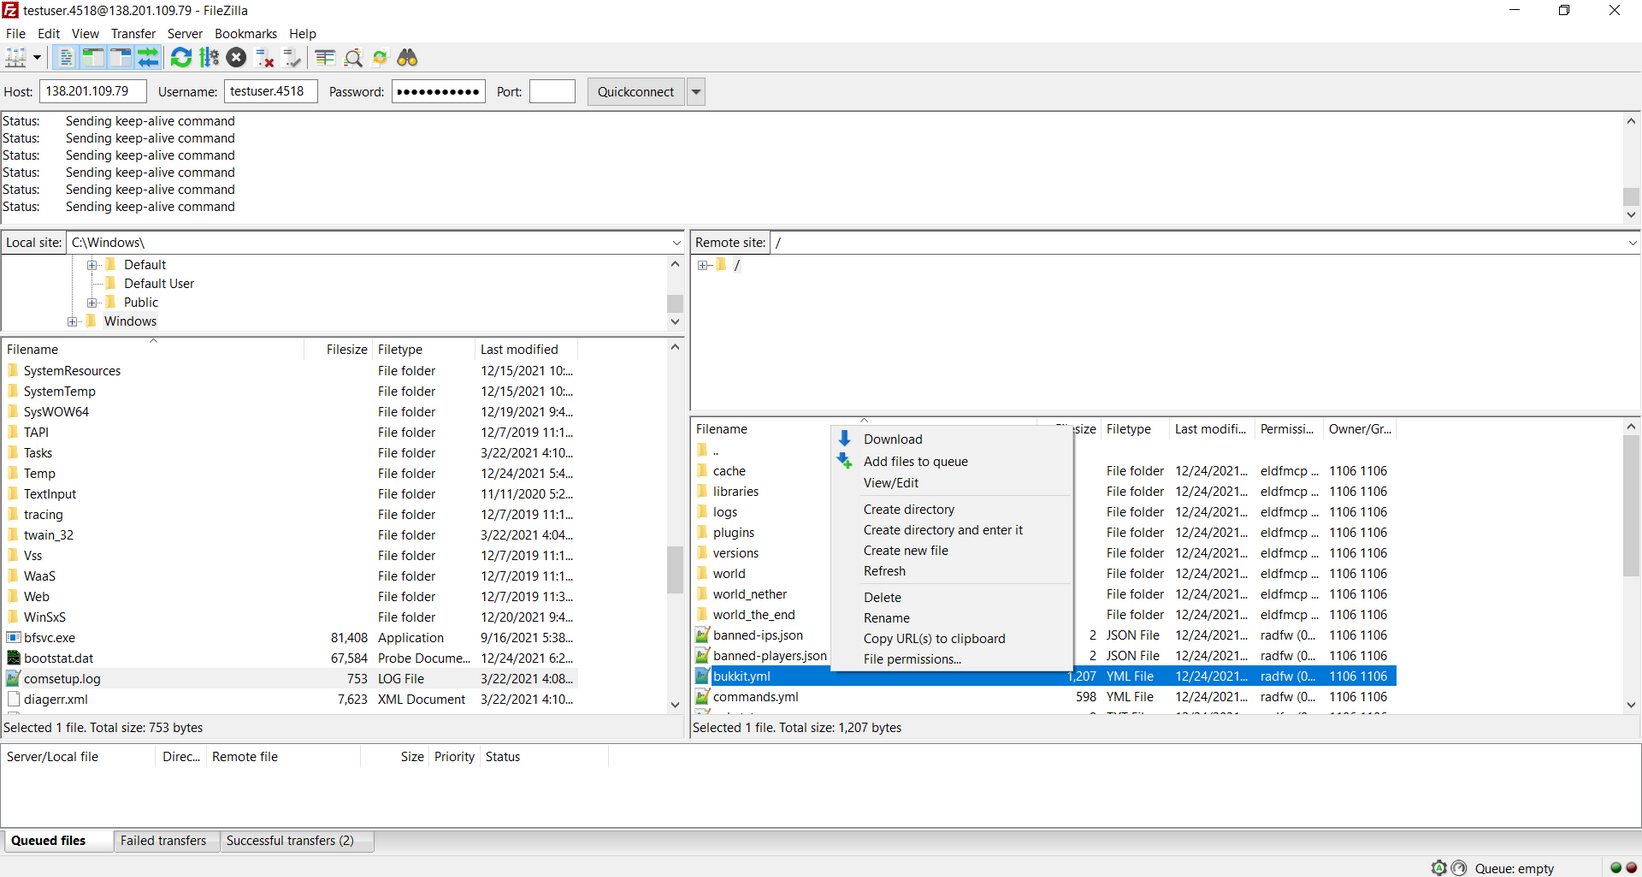
Similarly, you can download files from the server or edit them by right-clicking the server file:

