Reverse DNS (rDNS) is the DNS record that associates an IP address with a domain name. It is especially important for servers that send emails, to prevent them from being flagged as spam.
Below are the steps to change the rDNS of a VPS via the Virtualizor panel from KeksHost.
1️⃣ Log in to the Virtualizor panel
Go to https://cloud.kekshost.com:4083 (the link you received in your welcome email).
Enter the username and password you received when your VPS was activated.
2️⃣ Select the VPS you want to modify rDNS for
After logging in, go to the VPS list in the main menu.
Click on the name or IP address of the VPS you want to modify.
3️⃣ Access "Reverse DNS"
On the VPS management page, look for "Reverse DNS" in the left-hand menu.

Here you should see the IP addresses assigned to your VPS.
4️⃣ Edit the rDNS
Next to the IP for which you want to set the rDNS, there should be an "Edit rDNS" option or a pencil ✏️ icon.
Click on it and enter the domain name you want to associate with that IP (e.g.,
server1.example.com).
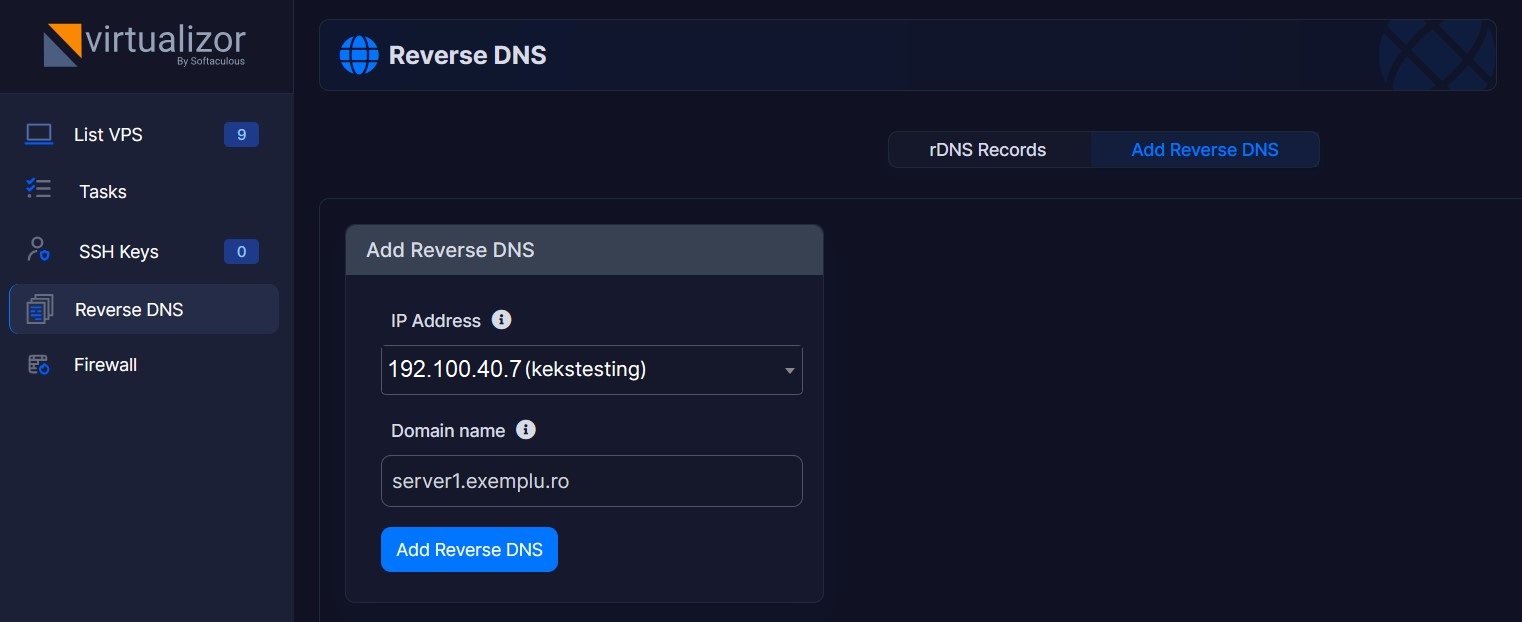
Save the change by clicking "Add Reverse DNS".
5️⃣ Wait for DNS propagation
rDNS changes can take between 15 minutes and 24 hours to fully propagate across the internet.
You can verify if the change was successful by using the command:
dig -x YOUR_IP +short
- or by checking with an online tool such as mxtoolbox.com.